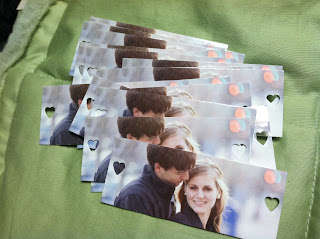
Now that I had my invitations and mini Moo cards with website information, the only thing left to do was assemble the final product. I could have just dropped the Moo cards into the envelope with the invitations, but I was a little nervous that people wouldn't see them—and I wanted to do something a little more special, since I wasn't doing much else with the invitations.
I took my heart hole punch (you knew that was coming) and, well, punched some heart holes. Pretty self-explanatory, right?
Personal photo
Anyway. All I needed now was a way to attach the cards to the invitations. I picked up two rolls of thin coral-colored ribbon. It looked like this. (I couldn't find the exact ribbon, so just pretend I was a good blogger and took a picture of the ribbon.)
Image via Easy Weddings
Note: Ten yards of ribbon is not the same as ten feet. Two rolls ended up being not quite enough (six invitations short!) so I went back to Walmart to pick up more to finish the invitations and to use with the crossword puzzle programs and I Spy cards. I was trying to mentally calculate how much I needed to buy but read "ten feet" on the rolls instead of "ten yards." So. I got a lot more than I needed. Good thing it was only $0.49 a roll!
Then I simply threaded the ribbon through one heart hole, under the picture, and out the other heart hole. I dabbed a little bit of glue on one end of the ribbon and pressed it against the other end to hold it firmly in place. Pictures always make more sense, so here's what it looked like in the end.
Personal photo / Cute carpet in my apartment, huh?
The ribbon holds the mini Moo card snug against the invitation, but all you have to do is slide the ribbon down to release the card and see the rest of the invitation information. I guess my only worry is making sure people look at the other side of the card. If you received an invitation like this, you would at least glance at the other side of the mini Moo card as you pulled it off, right? I'm hoping people will unthread the ribbon and hold onto the card since it has our picture and website.
Even just a simple project like this took me a few hours! I have way more respect for all you ladies out there to undertook a much larger invitations project now.
Tell me about your invites! And while you're at, anyone else worry about guests catching all the information on the cards? I could use some reassurance!


No comments:
Post a Comment